For races in which it's allowed, modifying the wheels in the Pinewood Derby kit is well worth the effort. The main things we'd like to accomplish in modifying our wheels are:
We can achieve both of these goals by simply slicing off most of the wheel tread. The resulting wheel is roughly the shape of a flat disc, except for the wheel bore that protrudes into the car. Contact between the track and the wheel is reduced to nearly its absolute minimum. The mass of the wheel changes from about 3.6 g to 2.5 g; more importantly, all the weight is removed at the furthest distance from the center, so the change in moment of inertia is much more than the 1/3 change in wheel weight.
There are places online that will sell you Pinewood Derby wheels that have been modified by professionals using very expensive precision machinery. This defeats the whole point of the Pinewood Derby as a construction project for the participants! Advantage in the Pinewood Derby should be the result of the efforts of the scout, with the parent's help; mail-ordered wheels convey advantage only from Dad's checkbook. Happily, wheel modification is no more difficult than other aspects of car construction, so the use of third-party wheels is unnecessary.
Searching the web for advice on this topic brings up a few links that suggest using a utility knife or x-acto knife to slice off the tread while the wheel is turned with an electric drill. The difficulty with this is that it's very difficult to hold the knife sufficiently steady while holding it against a spinning wheel. The blade wants to slide sideways across the surface of the wheel, and can be difficult for either the scout or an adult to control.
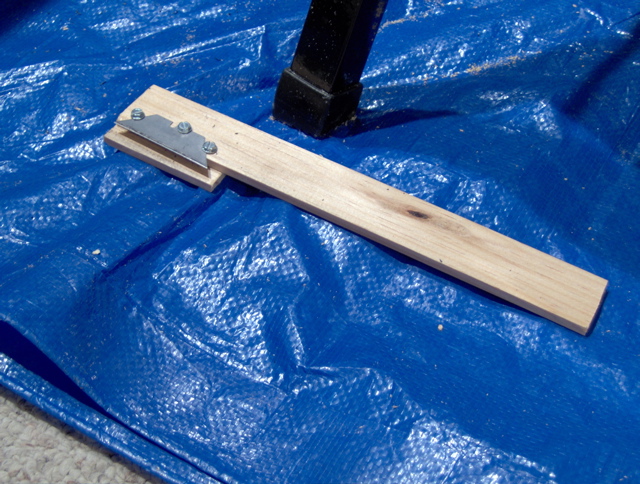
After a lot of thinking about jigs or other apparatus, we arrived at a solution to this problem, and it's surprisingly simple. We call it the Wheel Knife.
Our wheel knife is constructed from two lengths of flat moulding, available at the local home center. The moulding is nominally 1/4" thick (more like 3/16"), which just happens to be an ideal thickness for our application. The longer length acts as the tool handle, and provides a fixed separation between the back guide and the blade. The back guide is just a second short length of moulding, offset from and glued to one face of the handle, and rests along the edge of the wheel in order to locate the blade in a fixed plane. The blade is an ordinary utility knife blade, attached with short screws. (The use of screws means that the blade can be changed when it dulls.)
|
|
|
|
|
|
|
Other than the width of the handle, none of the dimensions are critical, as long as you keep these constraints in mind:
NOTE: Be sure that the blade is securely fastened to the handle. You want to certain that the blade isn't going to come off by accident.
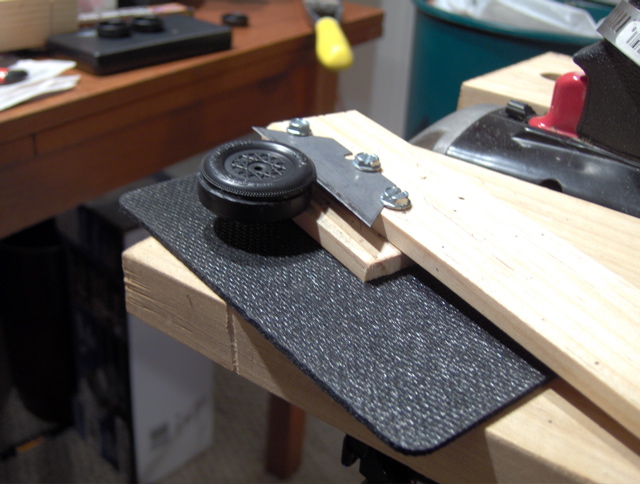
To use the wheel knife, use a mandrel and spin the wheel in an electric drill. Lower the knife onto the wheel so that the back guide rides along the edge of the wheel. (Note that it's riding on the edge of the wheel that, if you weren't cutting it off, would be closer to the car body.) Apply slight pressure as needed to let the knife slowly cut through the wheel.
Cutting the wheel will heat up the knife and the wheel tread. It should be possible to obtain a cleaner and more even cut if you drip water on the knife with an eyedropper, to keep it cool, but we haven't tried this yet.
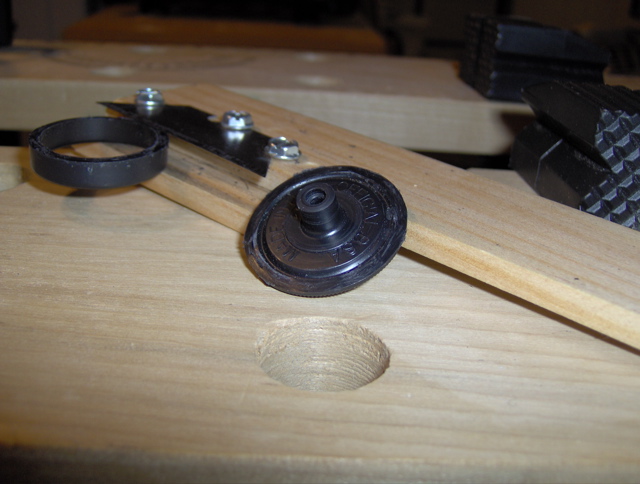
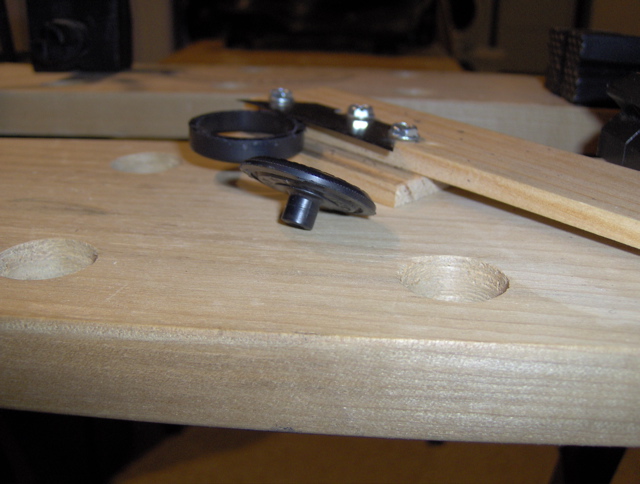
Our mandrel broke just before we were to put our wheel knife to the test. Undaunted, we were able to cut a wheel cleanly just by turning it by hand against the knife. Doing it this way takes a while, but it certainly can be done. (The pictures with the wheel show the result.)